Kitchen under cabinet lighting (part III)
The last step of the undercabinet lighting installation is basically making it nice and neat: cover holes, wires, etc. The way I did it is not optimal because mine required a bulkier wire raceway to cover the wire connectors. Had I chosen slimmer connectors, I could've used V-shaped raceways that would look better. But it's not horrible, At least, I don't think so.
The parts I used for covering wires and holes include:
- 254in Cord Hider Cover, Delamu Cable Concealer Raceway, PVC Cable Hider Cover, Cuttable Wire Cover Hider for TV on Wall, 15x L16.9in W0.95in H0.55in, CC01-15White (the smallest raceway that were big enough to cover my wire connectors)
- Cord Grommet White 1" #1041WH (5 Grommets) (I used two sets to cover the tops and bottoms)
- IKEA MONTERA Cable management, white 43" (to cover vertical section of the wire that does not have any connector on the way)
- Key hooks (to hold cables under the cabinets, bough a set at a dollar store)
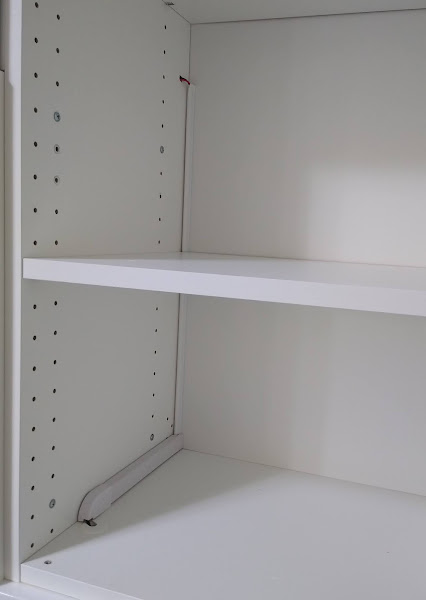
First, I cut the corner of the cabinet shelf that was on the way of the vertical wire to fit the IKEA MONTERA cable cover:

This allowed the cable cover to not be on the way:

Then I cut the cable raceways in half and also cut of the ends of the racetrack elbow connectors that came in the package to be used as end caps:

I attached the racetracks using the double-sided tape that came with the package (it would've been better to use the screws, but I felt lazy):

Put on the racetrack cover:

And put in the end caps (had to cut off corners to let the cable through):

At the bottom of the cabinet, I used the keychain hooks to hold the cables so they do not drop too far and placed the grommet covers at the top and the bottom of the cabinet holes:

There is still a bit of exposed wire in the middle of the cabinets (where the wire enters the horizontal hole), but I can live with it for now. If I find an easy way to cover it, great, if not, I will not lose any sleep over it.
| PREVIOUS | INTRODUCTION | NEXT |
Comments
Post a Comment